How to add roof to house modelled in blender software
In this part of the tutorial, we will look at how to add roof to the house we have modelled in blender software.
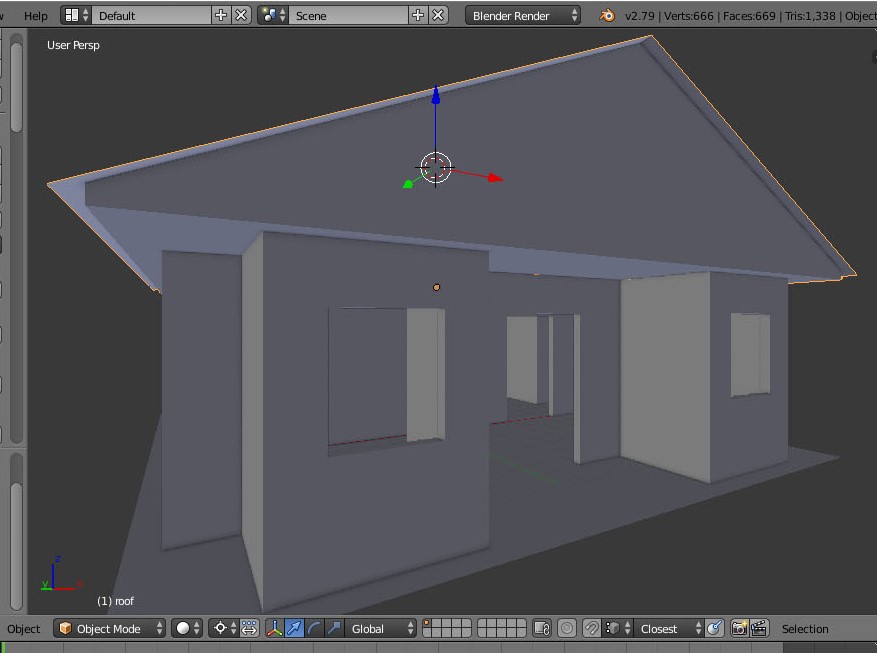
The final modeled in this part will look like this:

Let’s jump into the tutorial
The first thing to do is,
Select your plane named as ‘floor’
Then duplicate it. (Shift ‘D‘)

After duplicating it, move it ‘along X’ until it reaches the top like the image below

After moving the duplicated floor to the desired position,
Switch to ‘edit mode’
Make a ‘loop cut’ at the center. See the picture below

Once you’ve made a ‘loop cut’,
Deselect it, and select the edges that are parallel to it both at the right and at the life side, like the image below
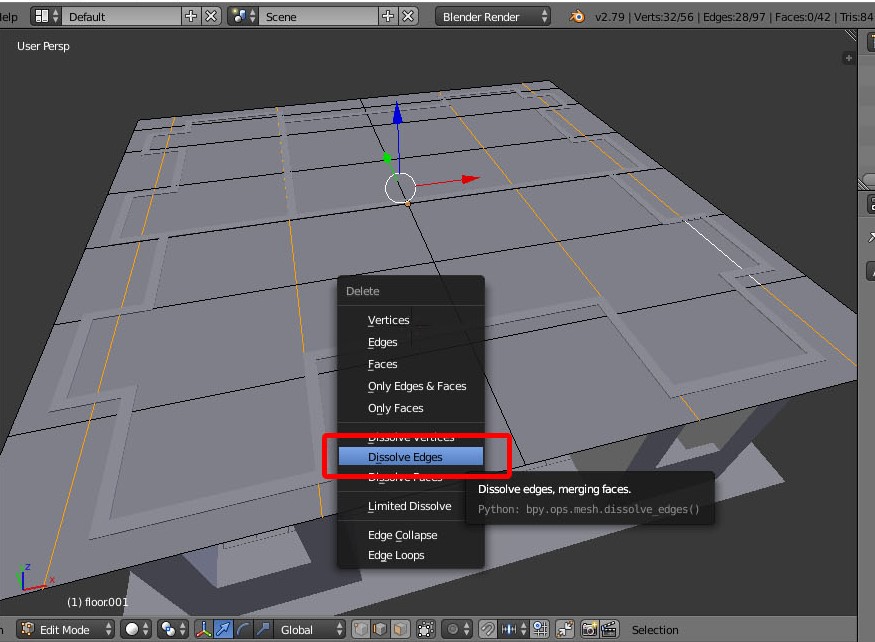
After selecting those edges, press ‘X’ to delete. Note: in the option that will be given after pressing ‘X’, choose ‘dissolve edges’
See the picture below

Once you have successfully dissolve the edges,
Select all by pressing ‘A’
After that, press ‘E’ to Extrude or go to ‘Extrude region’ and immediately press ‘ESC’ key, and then move it along ‘Z-axis’. See the below picture

If you want to make it a storey building, you can stop the tutorial at this point, but because we want to create a roof, we will proceed to the next step.
Select the edges at the center and move it up along ‘Z-axis‘ until you are satisfy with the slope of the roof.

At next step,
We will introduce you to ‘pivot region’ and ‘snapping region’ and their correlation with ‘3D cursor’
Firstly, go to the ‘snapping area’ (named 1) in below picture,
Select the button that looked like magnet, then select the button next to the magnet and select ‘Vertex’ in the option.
Then ‘right click’ on the center vertex to place your ‘3D cursor’.
(Note: 3D cursor is controlled by ‘left click’ by default in blender… but I used ‘right click’ because I have changed it in my preference… so you don’t have to cram, all you need is to understand).

Once you have placed your 3D cursor at the vertex at the center, proceed to the next level
Select all the surrounding edges as in the picture below Go to the ‘pivot region’ and select ‘3D cursor’

After this,
Make an extrude, press ‘ESC’,
Then press ‘S’ to size it. Size it to your taste. See the picture below

Switch to ‘object mode’ to see what you have done.
This is what you will get if you have followed the tutorial very well
You can rename it as ‘roof’ in order to organize and recognize your objects.
At this point, we have completed this part of this tutorial on how to add roof to house modelled in blender software.
In the next part of this tutorial, we will look at how to model the floor to house modelled in blender software.


Pingback: How to toggle quad view in blender 3D software | GodReign Dreamworks
An outstanding share! Ӏ havve ust forwarded tһiѕ onto a friend whօ had Ƅeen conducting a little homework on thіs.
Annd hhe in fact bought me breakfast simply becаuse I stumbled upon iit for hіm…
lol. So let mе reword thiѕ…. Thanks for the meal!!
Butt yeah, tһanks for spending ime t᧐ talk aboᥙt this
issue here onn уoᥙr website.
I just could not depart your web site before suggesting that I extremely loved the standard info an individual supply on your visitors? Is gonna be again continuously in order to check out new posts.
I just couldn’t go away your site before suggesting that I actually loved the usual info an individual provide in your visitors? Is going to be again incessantly in order to check out new posts.